Bring your world to viewers with tools that translate presence into compelling on‑screen content. LIV offers Mixed Reality Capture, avatar systems, and advanced tracking so creators can craft a cinematic mixed reality experience without losing personality.
Match your vision to the right toolkit from day one. Use LUTs, filters, camera control, and avatar calibration to make each shot count. Prioritize image, audio, and reliability so your page looks polished and your audience returns.
Set clear goals—community growth, watch time, or partnerships—and let those metrics guide choices like capture quality and network setup. Adopt a modular workflow that scales from simple gameplay captures to complex mixed reality scenes.
Key Takeaways
- Plan your mission: focus on presence and creator energy to engage your audience.
- Match tools to goals: leverage LIV’s capture and avatar features for strong on‑screen content.
- Keep standards high: consistent image and audio quality build trust.
- Design for scale: use modular setups that grow with your channel.
- Test for reliability: verify network, links, and sync before going live.
Why VR streaming is exploding right now
A wave of new headsets and creator tools is turning immersive play into must-watch content. Better standalone devices plus creator-focused apps finally translate presence into clear, watchable broadcasts.
LIV’s StreamerKit adds in-headset chat and alerts with ultra-low overhead, so creators interact without glancing at a second screen. Mixed Reality Capture lets you composite yourself into games using webcams or DSLR cameras, showing both player and game in one frame.
Virtual Desktop brings PCVR games and desktop apps into a giant virtual screen across Meta Quest, Pico, and HTC standalone headsets. To run this smoothly, you need a VR-ready PC and a 5 GHz AC/AX router, with the computer wired via Ethernet.
- Momentum: better hardware and studio-grade tools.
- Clarity: mixed reality makes game action obvious to new viewers.
- Creator-first: in-headset chat reduces friction and keeps immersion.
The essential gear checklist for a seamless VR experience
Pick gear that scales with your ambition so every session looks and sounds professional.
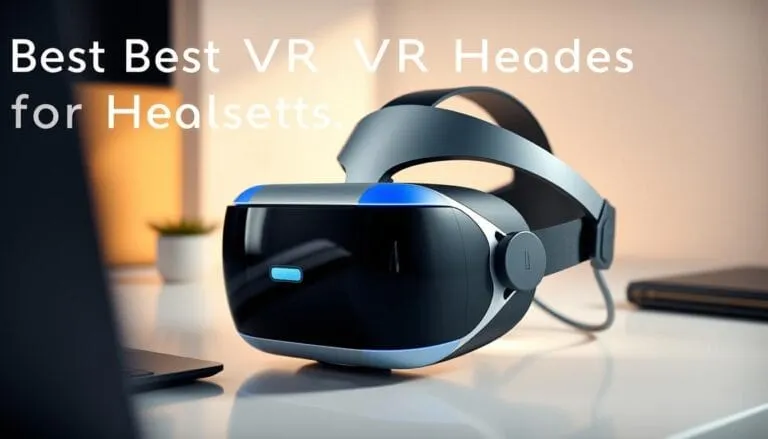
Headsets and supported devices: Choose a modern standalone or tethered headset with broad software support. Virtual Desktop supports Meta Quest 1/2/3/3S/Pro, Pico Neo 3/4/4 Ultra, HTC Vive Focus 3/Vision/XR Elite, and Play for Dream MR.
PC and performance essentials: Use a Windows computer that meets VR-ready specs. For PCVR game capture you need at least a GTX 970 gpu, a balanced CPU, fast storage, and a wired Ethernet link to a 5 GHz AC/AX router to avoid drops.
Audio and face camera: Invest in a clear microphone first—audio keeps viewers engaged. Add a face camera to humanize your feed; webcams are simple, DSLRs give a cinematic look.
- Plan your capture pipeline early: Mixed Reality Capture, avatar VTubing, or direct gameplay.
- Support for cameras ranges from webcams to high-end DSLRs; LIV can export layers for post-processing.
- LIV Avatars accept .VRM, .Avatar, and Ready Player Me with up to 14-point tracking including fingers.
- Stabilize power, cooling, and keep spare cables and mounts on hand.
Final tip: Match each purchase to your goals. A compatible headset, a capable computer with a solid gpu, and a reliable camera will keep production smooth and your audience coming back.
Network setup that actually works for VR game streaming
Set your network up once and you’ll avoid most connection headaches during a show.
Wired where it matters: Run an Ethernet cable from your computer to the router. This reduces latency and jitter, letting your headset use a clean 5 GHz AC/AX Wi‑Fi link for best performance.
Router tips to keep connections stable
In router settings, enable UPnP for auto port management and choose Full cone/Open NAT when available. These options improve connectivity and matchmaking reliability for remote links.
- Place the router in line‑of‑sight and avoid interference from microwaves or crowded channels to protect throughput.
- If you see double NAT, switch the ISP modem to bridge mode or ask for a public IPv4 (or Dual Stack) to replace DS‑Lite.
- For remote connections, either use UPnP or forward TCP ports 38810, 38820, 38830, and 38840; traffic is end‑to‑end encrypted.
Practical habits for fewer surprises
Disable or add exceptions for VPNs and aggressive antivirus/firewall apps that can block the headset from reaching your PC. Segment heavy household traffic during showtime so your audience sees consistent quality.
If you travel with a Quest, document router profiles and test throughput and ping before going live. A short check can save an entire broadcast and keep your viewer experience smooth.
Building your software stack: OBS, LIV, and Virtual Desktop
Build a reliable software stack that turns capture tools into a smooth, repeatable show. Start with clear roles for each app so you can run the show from the menu and stay focused on performance.
OBS Studio is your production hub. Use scenes, sources, and hotkeys to design layouts that are easy to trigger. Bind hotkeys and organize the menu so transitions are confident and fast.
LIV adds Mixed Reality Capture with machine‑learning background removal, LIV Avatars (.VRM/.Avatar/Ready Player Me), LUTs, filters, and per-layer exports. Composite yourself cleanly over gameplay and export layers for post edits.
Virtual Desktop streams PCVR games and your desktop from a wired computer to supported headsets over a 5 GHz AC/AX Wi‑Fi link. Disable Steam Desktop Theater for better compatibility with many titles.
- Keep the computer lean: close background apps and prioritize OBS and VR processes for steady encoding.
- Organize sources: logical scene structure prevents black screens and messy overlays.
- Document versions: save settings and versions so you can reproduce a stable setup quickly.
Step-by-step: set up OBS for VR games
Get OBS ready to capture your headset feed and face cam with a few deliberate steps. A clean setup keeps the focus on the game and your presence, and it prevents avoidable technical issues once you go live.
Game Capture and choosing a specific window
Create a new scene and add a Game Capture source. Choose “Capture specific window” so OBS locks onto the correct executable for your game.
If you run SteamVR titles, remember to disable Steam’s Desktop Theater mode to avoid capture conflicts and black screens.
Adding a Video Capture Device for your real-world camera
Add a Video Capture Device to include your face cam or mixed reality feed. Frame the camera so it enhances the action rather than blocking important UI on the screen.
Scene and source order to prevent black screens
Order your sources so gameplay is at the bottom, your camera or MR layer sits above it, and overlays and alerts are on top. Proper ordering prevents accidental black screens caused by scene priority.
- In OBS Settings, confirm resolution and FPS match your performance budget.
- From YouTube Studio: Create > Go Live > Streaming software to get a Stream Key. Paste it into OBS Settings > Stream and verify the ingest server.
- Test transitions, audio sync, and hotkeys. Use a short recording test to confirm mic, game audio, alerts, and music balance.
“A fallback scene with a simple ‘Be Right Back’ helps you troubleshoot without ending the broadcast.”
Pro tip: Configure hotkeys to toggle overlays and switch scenes so you can run the production without leaving the headset. For more capture workflow guidance, see a practical setup guide for recording and capture.
Mixed Reality Capture that wows your audience
Mixed reality capture turns a simple game feed into a cinematic, shareable moment for viewers. Use LIV’s machine‑learning background removal to remove distractions without a green screen and get a crisp subject edge that holds during motion.
Using LIV’s machine‑learning background removal
Enable the model and tweak sensitivity until the subject separates cleanly. This speeds setup and lets you move between spaces without rebuilding a backdrop.
Camera choices from webcams to DSLR for clean composites
Pick a camera that fits your room and budget. Webcams are simple and reliable. DSLR or mirrorless cameras give better low‑light performance and shallow depth for a cinematic look.
Layer exports and custom masking for post-production
Export individual layers for editing: color grading, reframing, or motion graphics. Use custom masks to hide odd props or edges and apply LUTs and Filters sparingly to preserve natural skin tones.
- Fine‑tune distance, height, smoothing, and FoV in real time for natural motion.
- Keep even lighting to reduce edge artifacts during fast movement.
- Calibrate once and save profiles so your setup is repeatable across sessions.
“A clean composite sells the experience — viewers notice the polish.”
VTubing in VR with LIV Avatars
Bring a virtual persona to life with tight tracking, expressive rigs, and camera modes that fit each scene. LIV Avatars let creators map identity into a believable presence that works on headset captures and recorded content.
Import formats: Load .VRM, .Avatar, or Ready Player Me models to match your brand and scale your content easily.
Tracking and expression
Choose half‑body or full‑body tracking based on room and gear. LIV supports up to 14‑point tracking, including full finger motion.
Dynamic bones, eye and mouth animations add subtle motion. Bindable expressions (coming soon) will let you trigger reactions on cue.
Camera modes for performance
Switch between Selfie, Third‑Person, and Gamepad camera modes to change framing fast. Selfie works for chats, Third‑Person for cinematic play, and Gamepad for director control.
- Import the avatar format that fits your look.
- Configure half or full body plus finger tracking for natural gestures.
- Swap camera modes to match the scene or game pace.
- Use StreamerKit for in‑headset chat and alerts so interaction stays fluid.
“A lively avatar keeps viewers connected — motion and framing make the difference.”
Platform setup: stream to YouTube and beyond
Set up your platform links early so your broadcast finds the right audience when you go live. Start in YouTube Studio by selecting Create > Go Live > Streaming software. Generate a new event and copy the Stream Key.
In OBS open Settings > Stream and paste the key. Choose the correct platform and ingest server. Validate latency mode to match your interaction style—ultra‑low for rapid chat, normal for stability.
Start Streaming in OBS to send the feed, then confirm the preview in YouTube Studio. When preview looks good, click Go Live on the channel page.
- Prepare metadata: set titles, descriptions, tags, and thumbnails so your videos are discoverable after the show.
- Protect your signal: test your computer network, close bandwidth‑hungry apps, and disable or allowlist VPNs and strict antivirus.
- Fail safes: keep a backup scene and a short local recording to recover from platform hiccups.
“A quick preflight checklist—privacy, category, monetization—keeps the launch confident and repeatable.”
Optimize performance without sacrificing quality
Small changes to system settings often unlock a big jump in capture stability and image quality.
Keep drivers and displays healthy. Update your gpu drivers regularly and confirm laptops use the correct graphics processor. Disable HDR/WCG and Windows Night light to avoid color pipeline conflicts that can cause black screens or capture errors.
Capture and output choices
Right-size your capture resolution and output. Pick an encoder and bitrate your computer and internet can sustain for long sessions. Lowering in-game settings can free GPU headroom for encoding without killing visual fidelity.
Background tasks and security
Limit background processes that compete for CPU/GPU. Add exceptions for OBS, LIV, and Virtual Desktop in antivirus and firewall apps to prevent throttled traffic or “Measuring bandwidth” disconnects.
Use LIV effects with intention
Apply LUTs and Filters sparingly. Subtle grading elevates the look without overwhelming your render budget. Save profiles in OBS and LIV for action-heavy versus cinematic titles so you can switch presets quickly.
“Watch real-time metrics—render time, dropped frames, and network throughput—to catch issues early.”
- Update drivers and verify GPU selection on laptops.
- Turn off HDR/WCG and Night light in Display settings.
- Match resolution, bitrate, and encoder to your computer and internet.
- Limit background apps and whitelist capture tools in AV/firewall.
Fix common capture and black screen issues
Black screens and capture hiccups are often caused by browser DRM, GPU swaps, or display detection issues. These problems are usually solvable with a few targeted checks so you can get back to creating confidently.
DRM-protected video can block capture. If a protected player (Netflix, Hulu) shows a black screen, try Firefox; many other browsers and some Windows Store apps enforce stricter DRM paths that prevent capture.
Nvidia laptop GPU selection and Steam Desktop Theater
On Nvidia Optimus laptops, open the Nvidia Control Panel and set the preferred graphics processor to High‑performance Nvidia processor. Restart the computer to apply the change.
Also, disable Steam’s Desktop Theater mode for affected games to avoid compositor conflicts that cause blank frames.
Monitor detection and app conflicts to disable
Make sure your monitor is powered and detected by Windows. Some capture pipelines need an active framebuffer to work.
- Turn off Night light, HDR, and F.Lux—color-shifting apps can corrupt the captured signal.
- Audit security suites (Avast/AVG/McAfee). Whitelist or remove modules that hook graphics or network layers.
- Restart after driver or control-panel changes so GPU and power profiles take effect.
“Keep a short troubleshooting flow so you can fix issues during a live session without ending the show.”
Connectivity problems: bandwidth, firewalls, and antivirus
Network and security settings often hide the true cause of disconnects. A quick, focused check before you go live can stop most surprises and keep your session smooth.
Start local: verify your computer and headset share the same SSID and aren’t isolated by guest network rules. If you see “Computer is unreachable,” this simple mismatch is often the culprit.
Windows Firewall, VPNs, and problematic AV suites
Open Windows Firewall and confirm your VR and streaming app have permission on Private networks. Restart the network services or the PC after changes so rules apply cleanly.
Disable VPNs during your stream. Tunneling breaks device discovery and can turn routing into a guessing game.
Avast/AVG/McAfee pitfalls and exclusions
Set Avast/AVG network profiles to Private to allow device talk. For McAfee, Norton, or aggressive suites, either add exclusions for low‑latency traffic or briefly disable the app while testing.
Bandwidth tests, “Measuring bandwidth” disconnects, and fixes
“Measuring bandwidth” often traces to outdated GPU drivers, HDR/WCG enabled, or security hooks inspecting packets. Update GPU drivers, turn off HDR/WCG, and retest without background AV modules.
- Run throughput and ping tests to spot congestion before you go live.
- Use router QoS or schedule heavy downloads away from showtime.
- For remote sessions, enable UPnP or forward TCP 38810, 38820, 38830, 38840 to allow end‑to‑end connections.
“Document the working firewall and router settings so you can restore a known-good state quickly after OS or firmware updates.”
Final tip: record the checklist and test it before the next show. A few minutes of prep now keeps your stream and setup healthy through the end of the broadcast.
vr streaming remote and on the go
Remote broadcasts can feel fragile, but careful prep makes them dependable. Pack a compact router, an Ethernet cable, and a tested profile so you can wire your setup and keep latency low. Test from another network before you travel to confirm ports, auth, and bitrate behavior.
Virtual Desktop remote connections with UPnP and ports
For Virtual Desktop remote links, enable UPnP so the Streamer can auto-forward ports. If you prefer manual control, forward TCP 38810, 38820, 38830, and 38840 to the host.
All traffic uses end-to-end encryption, so forwarding these ports only opens secure tunnels for the app.
ISP constraints: DS‑Lite, IPv4, and double NAT
Know your ISP topology. DS‑Lite or double NAT can block inbound sessions and stop remote visits from reaching your machine.
- Request Dual Stack or a public IPv4 if you need reliable incoming connections.
- Use router bridge mode or contact support when double NAT prevents reachability.
- Keep admin credentials and a saved config file to restore a known-good state fast.
“Bring your own network control—test, document, and adapt bitrate on the fly to protect quality for your viewers.”
In‑headset chat, alerts, and community interaction
Keep your community close even while you’re fully immersed by bringing chat and alerts into your headset view. A lightweight HUD keeps conversation flowing and preserves your focus on play and performance.
LIV StreamerKit HUD for chat and notifications
Activate StreamerKit to display a customizable chat widget and alert popups with ultra‑low overhead. Tweak size, opacity, and placement so messages remain readable without blocking critical UI.
Integrations with Streamlabs, Streamelements, and Discord
Connect Streamlabs, Streamelements, and Discord to centralize alerts and community touchpoints in one lightweight software layer. Build chat filters and quick‑reply workflows to keep interactions smooth during intense moments.
- Use scene‑aware overlays to reduce noise in clutch moments while highlighting new followers or donations.
- Establish moderation rules and empower trusted members to protect the chat atmosphere.
- Celebrate milestones with branded animations and stingers that make viewers feel part of the show.
Pro tip: keep performance top‑of‑mind—StreamerKit’s low overhead helps preserve frame time so your capture and the app menu stay responsive.
“Bring chat to your view and keep the conversation part of the experience.”
Designing scenes that showcase your game and self
Frame your scenes so the game action stays obvious while your on-camera moments add human energy. Put gameplay front and center. Let overlays and camera angles support the story, not hide it.
Use LIV’s layer exports to save clean elements for post work. Exported layers let you build highlight reels and shorts without re-capturing the source.
Tune camera controls—distance, height, smoothing, and FoV—to craft a signature look. Small changes to smoothing and focal length make your presentation feel cinematic and consistent.
- Create a main gameplay scene with clear sightlines and minimal overlays so the action reads on mobile and desktop.
- Build an MR-focused scene where the capture composite emphasizes physicality and reactions; disable Steam Desktop Theater when using Virtual Desktop to avoid capture conflicts.
- Design modular overlays—lower thirds, alerts, and chat—that toggle per title to prevent UI clashes.
Keep brand consistency: use matching typography, color, and motion across thumbnails and live layouts. Save LUTs and filter presets for different game types so each session loads with the right mood.
“Test every scene at 1080p and 720p so critical elements stay legible at lower bitrates.”
Comfort, safety, and creator well‑being on stream
Start with simple checks that protect you and the show. Adjust your headset fit, interpupillary distance, and strap tension before going live. A secure fit reduces motion fatigue and keeps you present for longer.
Pace matters. Schedule brief breaks, hydrate, and stretch at set intervals to maintain energy and a steady on‑mic presence. Practice a quick breathing or grounding routine to stay calm during intense moments.
Protect your space and gear. Clear trip hazards, secure cables, and use basic cable management if tethered. Dim harsh lights but keep even illumination on you for a flattering camera image and to avoid screen color shifts.
- Monitor thermal and fan noise from your computer—hot systems throttle and noisy fans spoil audio.
- Disable Night light and HDR on the OS to avoid visual strain and capture conflicts with the screen.
- Agree on a safe word with moderators to trigger quick scene changes when you need a private moment.
“Small comfort routines create bigger, longer quality sessions.”
Go live with confidence and measure what matters
Begin each show by validating the critical paths so your audience only sees the experience, never the fixes. A short preflight saves time and preserves energy for the show itself.
Preview checks, audio mixes, and stream health
In OBS verify your Stream settings and scene order. Send a preview to YouTube Studio and confirm ingest stability before you hit Go Live.
Check mic levels, game capture lock, and alert routing. Watch the platform preview and health indicators for dropped frames, transcoding status, and latency targets.
Track render time and network throughput inside your software so you can adjust bitrate or encoder mid‑show with minimal disruption.
Post‑stream review and iterative improvements
Record locally while live to capture high‑quality videos for highlights and analysis. Local files let you reframe, color grade, and build shorts without a second session.
After each session, review VOD segments and platform analytics to spot where pacing rose or fell. Document working encoder, bitrate, and resolution settings so you can reuse profiles per game or format.
“Make one or two changes per session; measured tweaks compound into standout production quality.”
- Run a preflight: scenes, audio routing, mic gain, and alerts.
- Monitor platform preview and stream health for ingest and latency.
- Record locally for post edits and future content reuse.
- Log dropped frames and throughput; compare engagement to format changes.
- Save working profiles and make one tracked change per show.
Conclusion
Wrap up with a clear foundation so creativity leads the way and technical problems stay quiet. Be sure to insert a , clear preflight step that you can run in minutes before going live. This keeps your focus on the audience and the story you tell.
Anchor your setup on a wired PC, a 5 GHz AC/AX Wi‑Fi link to the headset, and updated gpu drivers. Confirm OBS, LIV, and Virtual Desktop are configured and that UPnP or manual port forwarding works for remote links.
Disable Night light, HDR, and interfering security apps. Avoid double NAT or DS‑Lite without Dual Stack so connections stay stable for games and reliable streaming.
Use platform feedback and presets to refine visuals, audio, and interactivity. This is not the end—it’s the start of better shows on every page.


